


Best Cleaning Tablets for Baby Bottles in 2026
Find the best cleaning tablets for baby bottles. Compare formulas, safety standards, and what really works for busy parents in ...

Malaysia opens my.nuviebaby.com, prices in RM.

When you're feeding a baby six or eight times a day, the bottles pile up fast. Dr Brown bottles are brilliant for reducing colic, but those extra vent parts make cleaning feel like an extra job. Finding the right dr brown bottle cleaner approach matters because you're doing this multiple times every single day, and you need something that actually works without taking over your kitchen.
Dr Brown bottles come with internal vent systems that reduce air bubbles and colic symptoms. That's the good news. The less good news is that the vent insert, reservoir, and thin tubes collect milk residue in places your hand can't easily reach.
Ordinary bottle brushes often miss the narrow spaces inside vent components. Milk fat and formula stick to plastic, and if you don't get everything clean, you're building up bacteria exactly where your baby's milk flows. The NHS recommends thorough washing and sterilization for all bottle parts to prevent illness.
The vent system has four separate pieces per bottle. Each one needs washing, rinsing, and sterilizing. That's 32 small parts if you're rotating through eight bottles, which most parents do to stay ahead of feeds.
Common problem areas include:
Standard dishwasher cycles don't always reach these tight spots. Hand washing works if you have the right tools and the energy at 2am.
Let's be honest about what manual cleaning involves. You'll need dedicated brushes for different parts, patience, and a system that doesn't leave bits soaking in the sink overnight.
A proper dr brown bottle cleaner kit includes more than one brush. You need:
Hot soapy water works, but the water needs to be genuinely hot. Most people don't run the tap hot enough to properly dissolve milk fat. According to expert guidance on bottle cleaning frequency, bottles should be cleaned immediately after each feeding to prevent bacterial growth.
Here's the process that actually gets things clean:
The whole process takes 8-10 minutes per full bottle if you're thorough. Multiply that by however many bottles you're washing per day.
Dr Brown bottles are dishwasher safe, which sounds convenient until you realize small parts fall through the rack or flip over and fill with dirty water.
Use a mesh bag or dishwasher basket designed for small parts. Put vent inserts, reservoirs, and travel discs inside so they stay upright and actually get clean. Place bottles and nipples on the top rack only.
Dishwasher limitations you should know:
Run the hottest cycle your machine offers. The sanitize setting helps if you have one. But dishwashers don't sterilize to medical standards, they just clean. You'll need a separate sterilization step afterwards.
| Cleaning Method | Time Required | Effectiveness | Effort Level |
|---|---|---|---|
| Hand washing | 8-10 min/bottle | High (if thorough) | High |
| Dishwasher | 60-90 min cycle | Medium | Low |
| Sterilizer | 10-15 min | High | Medium |
| Automated washer | 30-60 min | Very high | Very low |
Cleaning removes visible milk and debris. Sterilization kills bacteria you can't see. Both matter, and they're not the same thing. Forbes outlines multiple sterilization methods that work after proper cleaning.
The NHS recommends sterilizing bottles until your baby is at least 12 months old. Some parents continue longer, especially if their child was premature or has health concerns.
Boiling: Put all parts in a large pot of boiling water for 10 minutes. Free but requires watching a pot and uses significant energy. Parts must be fully submerged.
Electric steam sterilizers: These run cycles between 8-15 minutes. They're compact and fairly quick, but you still need to clean bottles separately first. Most hold 4-6 bottles.
Microwave steam bags: Convenient for travel. Takes 3-4 minutes but bags wear out quickly and you're limited to a couple bottles at a time.
Chemical sterilization: Tablets or liquid in cold water. Takes minimum 15 minutes. No heat involved, which some parents prefer, but you need to change the solution daily.
Dr Brown makes their own cleaning accessories designed specifically for their vent system. They work better than generic tools because they're sized for the actual parts.
The official dr brown bottle cleaner brush set includes a bottle brush, detail brush, and the critical vent tube brush. The vent brush is thin enough to actually pass through the internal tube without forcing it.
Regular dish soap works but choose fragrance-free options made for baby items. Heavily fragranced detergents leave residue that affects milk taste.
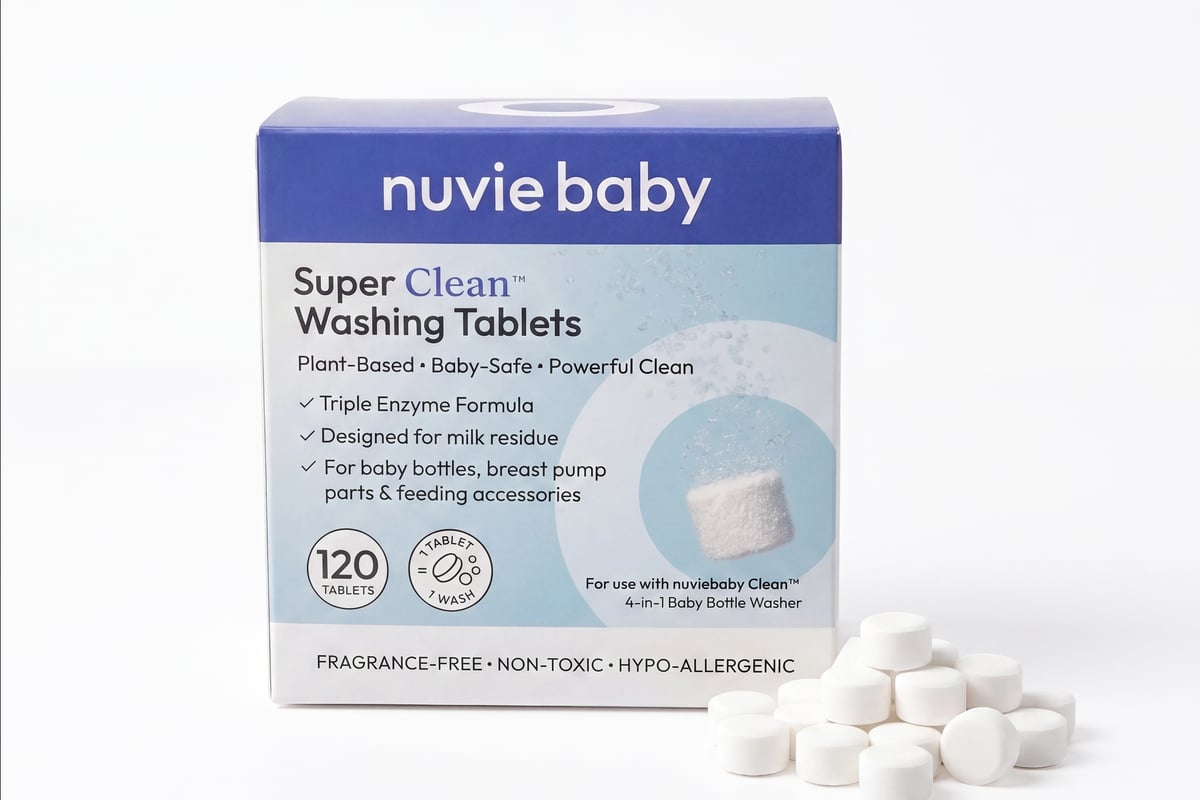
For parents using automated cleaning systems, specialized low-foam formulas prevent residue buildup while staying gentle on bottles. These formulas rinse completely and don't leave the soapy film that standard detergents can create on plastic.
The real question isn't how to clean one bottle perfectly. It's how to maintain your sanity when you're cleaning six bottles a day while running on four hours of sleep.
Don't wash bottles one at a time throughout the day. Collect them after feeds (rinsed only) and process them twice daily in batches. Morning batch and evening batch. This consolidates the mental load.
Tips that actually save time:
Some parents keep 12-16 bottles in rotation so they only wash once per day. It requires more upfront investment but cuts daily chore time significantly.
Brushes wear out. Once bristles splay or soften, they don't clean effectively anymore. Replace bottle brushes every 2-3 months, sooner if you're washing 6+ bottles daily.
The thin vent brush is especially prone to wear because you're threading it through tight spaces repeatedly. Knowing when to replace bottles themselves is equally important for maintaining hygiene.
Manual washing and dishwashers both have the same fundamental problem: they require you to do stuff. When you're already changing nappies, doing feeds, and trying to remember if you ate lunch, another multi-step chore is genuinely hard.
Automated systems handle the full cleaning cycle without you standing at the sink. They wash, sterilize, and dry in one go. No sorting parts into dishwasher baskets. No scrubbing vent tubes at midnight.
Modern bottle washer and sterilizer machines are designed around the reality that parents are exhausted and need something that actually works automatically. They accommodate the awkward shapes of Dr Brown vent parts and reach the tight spaces that cause problems with other cleaning methods.
High-pressure spray jets hit all surfaces from multiple angles. Steam sterilization reaches medical-grade temperatures. HEPA-filtered drying prevents recontamination. The whole process happens in a sealed environment.
For Dr Brown bottles specifically, the 360-degree spray pattern reaches inside vent tubes and reservoir discs without requiring special brushes or manual scrubbing. You load dirty bottles, add a cleaning tablet, and come back to sterile, dry bottles ready to use.
Even experienced parents make errors that compromise cleaning effectiveness. Here's what to avoid.
Don't skip immediate rinsing. Milk that sits for hours becomes exponentially harder to remove. The proteins bond to plastic and create a film that harbors bacteria.
Don't assume the dishwasher sterilizes. It cleans, but standard home dishwasher temperatures don't meet sterilization thresholds. You need a separate sterilization step or a dishwasher with a true sanitize cycle that reaches 75°C.
Don't reuse soapy water. Once you've washed three or four bottles, that basin water is contaminated. Dump it and refill with fresh hot soapy water for the next batch.
Bottles must dry completely before storage. Water droplets invite bacterial growth, especially inside vent tubes where air circulation is limited.
Don't dry bottles with a regular tea towel. The fabric transfers bacteria and lint. Air drying on a dedicated rack works if you have the counter space and 4-6 hours.
Guidelines on whether bottles need to be completely dry confirm that moisture creates contamination risk. Store bottles only when fully dry, preferably in a clean covered container rather than open on the counter.
Milk fat, formula residue, and mineral deposits create cloudy bottles and blocked vent holes over time. Standard washing doesn't always clear them.
White vinegar and baking soda work for most stubborn deposits. Fill bottles with equal parts white vinegar and hot water, let soak 15-20 minutes, then scrub and rinse thoroughly. For vent tubes, use a pipette to force vinegar through the tube.
Baking soda paste (baking soda plus just enough water to form paste) scrubs away protein buildup without scratching plastic. Apply, scrub gently, rinse completely.
Warning: Never mix vinegar and bleach. Never use bleach-based cleaners on bottles. The chemical reaction creates toxic fumes and bleach residue isn't safe for babies.
If milk residue has created permanent clouding or vent tubes have mineral blockages you can't clear, replace those components. Continuing to use compromised parts defeats the purpose of cleaning.
Most Dr Brown bottles and parts last 4-6 months with daily use and proper care. Nipples wear faster, usually needing replacement every 2-3 months as the silicone degrades.
If you live in an area with hard water, mineral deposits build up inside bottles and on vent components. This creates a white film that looks like the bottles are dirty even when they're clean.
Hard water also reduces cleaning effectiveness because minerals interfere with soap action. You need more detergent and hotter water to get the same cleaning results.
Use filtered or distilled water for the final rinse after washing bottles. This prevents new mineral deposits from forming as bottles dry.
Descaling solutions remove existing mineral buildup monthly. These are citric acid-based products that dissolve limescale without harsh chemicals. Run vent parts through a descaling soak, then wash normally.
For automated cleaning systems, regular descaling maintenance keeps spray jets clear and heating elements efficient. Check manufacturer guidance but monthly descaling is standard for hard water areas.
Let's look at the actual money involved over the first year because that matters when you're buying nappies and formula.
| Method | Initial Cost | Monthly Cost | Annual Total |
|---|---|---|---|
| Hand washing only | £15-25 (brushes, soap) | £5-8 (soap) | £75-120 |
| Dishwasher method | £10-15 (basket) | £8-12 (detergent, energy) | £106-159 |
| Electric sterilizer | £40-80 | £5-8 (energy) | £100-176 |
| Automated system | £300-500 | £15-20 (tablets, energy) | £480-740 |
The numbers look straightforward but don't account for time value. If hand washing takes 45 minutes daily and an automated system takes 5 minutes, that's 40 minutes back in your day. Every day. For a year.
Calculate what those hours mean to you. Sleep. Shower. Actually sitting down. Then decide what's worth spending.
Travelling with a baby means washing bottles in hotel sinks, at relatives' houses, or in public toilets. It's not ideal but it's reality.
Pack a compact dr brown bottle cleaner travel kit:
Ask accommodation about bottle washing facilities before you book. Hotels near hospitals often have better facilities for parents. Some have guest kitchens with dishwashers and sterilizers.
If you're completely stuck without proper facilities, here's the bare minimum:
This isn't ideal for regular use but it works in emergencies. Proper sanitization methods remain important even when travelling.
Washing bottles six times daily uses significant water and energy. It's worth considering the environmental impact alongside convenience and hygiene.
Hand washing uses roughly 10-15 liters per wash session if you're running water constantly. Dishwashers use 12-15 liters per full cycle. Boiling uses energy to heat 3-4 liters of water for 10 minutes.
Automated systems typically use 3-5 liters per cycle with efficient heating and spray systems. They're actually more water-efficient than hand washing when you account for rinsing.
Choose concentrated, eco-friendly baby detergents that require less product per wash. Avoid single-use wipes or disposable cleaning tools.
If you're replacing Dr Brown bottles, consider whether you actually need new bottles or just new vent parts. The bottles themselves last longer than the vent inserts.
For more information on bottle cleaning and sterilization methods, including detailed comparisons of different approaches, additional resources cover the technical details of maintaining hygiene while minimizing environmental impact.
The person doing night feeds often ends up doing bottle washing by default. That's exhausting and unfair. The solution is making the process simple enough that anyone can do it correctly.
Write down your exact dr brown bottle cleaner routine and stick it on the kitchen wall. Literally. Step-by-step with pictures if that helps.
Include specific details like:
The easier you make it for someone else to help, the more likely they'll actually do it. Automated systems eliminate most of these variables because the machine does the work consistently regardless of who pushes the start button.
Not all cleaning products are safe for items that go in babies' mouths. Check labels carefully.
Avoid anything with:
These chemicals leave residue even after rinsing. Babies consume whatever remains on bottle surfaces.
Look for products specifically labeled as baby-safe or food-grade. Plain hot water and basic soap work better than harsh chemicals anyway. The mechanical action of scrubbing matters more than the specific product.
Some feeding stages require more bottles than others. Growth spurts mean cluster feeding and suddenly you're using every bottle you own twice in three hours.
Keep 25-30% more bottles than you think you need. If your baby typically uses six bottles daily, own eight. This buffer prevents panic washing at 3am when you've run out of clean bottles.
Smart stocking levels:
Buy replacement vent parts in bulk. They're small, they wear out, and you don't want to wait for delivery when one breaks. Having spares means one less thing to worry about.
Finding the right dr brown bottle cleaner approach saves hours every week and reduces the mental load of constantly managing dirty bottles. Whether you choose manual washing, dishwashers, or automated systems depends on your specific situation, but the goal is the same: clean, safe bottles without it taking over your life. If you're ready for a solution that actually takes this chore off your plate, nuviebaby offers automated bottle washing designed by parents who understand exactly how relentless this particular job really is.
Find the best cleaning tablets for baby bottles. Compare formulas, safety standards, and what really works for busy parents in ...

Looking for an avent bottle cleaner solution? Learn the best cleaning methods, products, and what actually works for Avent bott...

White spots or cloudy film on bottles after washing? It's mineral deposit from tap water, and in most cases you can sort it out...

